Hours at a laptop leave many of us with tight shoulders, a stiff neck and tired legs. That is probably why sarvangasana, the shoulder stand, is one of the most searched asanas in India. Teachers often call it the queen of asanas, and that title has created big expectations.
This guide separates what is useful from what is exaggerated. You will learn how to do the pose step by step, what it may offer, who should avoid it, and how to practice through Dehradun’s changing seasons. It is written for Indian students and working professionals who want to practice sarvangasana safely, with the neck protected.
The word comes from Sanskrit. Sarva means whole, anga means limb or body part, and asana means posture. Together they describe the posture of all parts. In English it is the shoulder stand. You lie on your back, lift your legs and trunk until the body forms a line, and rest your weight on the shoulders and upper arms while your hands support the back.
What Is Sarvangasana?
It is an inversion, because the legs sit above the heart. Sarvangasana is closely related to Viparita Karani, an inverted practice described in classical hatha yoga texts. The shape taught in most classes today is a refined version of that older idea. The pose places real load on the neck and upper back. Treat it as an intermediate posture that needs preparation, not a beginner’s first asana.
Salamba Sarvangasana: The Supported Shoulder Stand
Most classes teach the supported form, where “salamba” means supported. Your hands hold the back and your arms carry part of the load. The unsupported version, Niralamba, releases the arms away from the back and is advanced. Unless a teacher tells you otherwise, learn the supported form first. Your arms and shoulders, not your head, should carry the weight.
Before You Practice: Preparation and Safety Basics
- Practice on an empty stomach. Wait three to four hours after a full meal such as a thali, and longer after heavy or fried food.
- Warm up first. A few rounds of Surya Namaskar or gentle shoulder and spine movement is enough. Skip vigorous neck rolls.
- Gather props. You need two or three firm folded blankets and a non-slip mat.
- Learn near a wall. Have a teacher watch you for the first few sessions.
Build toward the pose with Setu Bandhasana, Uttanpadasana and Viparita Karani (legs up the wall). These practice lifting the legs and supporting the back, so they ease the body into sarvangasana without loading the neck.
How to Do the Sarvangasana Yoga Pose?
Read through the steps once before you try sarvangasana. Move slowly.
- Fold two or three firm blankets into a rectangle. Lie on your back so your shoulders rest on the blankets and your head rests on the floor, giving the neck space.
- Keep your legs together and your arms beside your body, palms down. Breathe evenly for a few rounds.
- Bend your knees, press your palms into the floor and, as you exhale, lift the hips and bring the knees toward your face. Beginners can keep the knees bent throughout.
- Bend the elbows and place your hands on your back, close to the shoulder blades, with the fingers pointing up. Keep the elbows no wider than your shoulders.
- Walk the hands slightly toward the shoulders as you lift the trunk, then extend the legs upward. A perfectly vertical line is not necessary. A small forward angle is fine and kinder to the neck.
- Let the chin rest lightly toward the chest, but do not press it hard into the throat. Keep the head still, eyes closed or on the toes, and breathe normally. Never turn the head from side to side.
- Hold for 15 to 30 seconds at first. Over several weeks, build toward one to three minutes if everything feels comfortable.
- To come out, bend the knees and lower the legs over the head, release the hands to the floor, and roll the spine down one vertebra at a time. Lower the legs with the knees slightly bent, then rest until the breath settles before you sit up.
Alignment Checkpoints
Weight should sit on the shoulders and upper arms, not on the neck or head. Stack the hips over the shoulders and keep the legs firm without gripping the toes. If your throat feels squeezed or your face feels hot and heavy, come down. A stable sarvangasana feels light in the neck and steady in the arms.
Using a Wall and Props
Practice near a wall so your feet can touch it if you wobble. A strap looped just above the elbows stops them from splaying wide. If the legs will not rise, practice Viparita Karani with your legs up the wall instead and return to the full shape in a few weeks.
Benefits of Sarvangasana (Shoulder Stand)
Many websites promise big results from this pose. A fair look says more modest things. Research on single poses is thin, and most studies test whole yoga programs. With that in mind, here is what students and teachers commonly report.
Physical Benefits
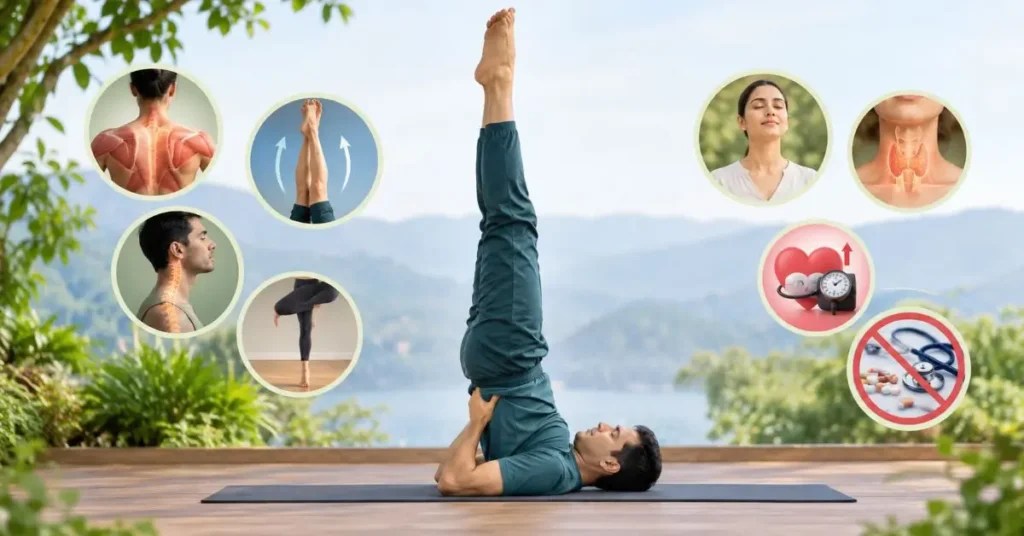
- It works the shoulders, upper arms, upper back and core, which hold the body steady.
- It reverses the usual pull of gravity on the legs, which many people find refreshing after a long day on their feet.
- It builds body awareness in the neck, shoulders and spine.
- Coming up and down slowly develops control and balance.
Mental Benefits
Because the head is low and the breath slows, many students feel calmer after sarvangasana. Add a short rest and slow breathing and the calm usually lasts longer. This is a common experience, not a guaranteed result.
Claims to Treat With Caution
Some pages say the shoulder stand cures thyroid disorders, diabetes, asthma or hair fall, or even increases height. The evidence does not support these claims. A few small studies of yoga programs that include the pose report changes in blood sugar, but those programs contain many practices, so the pose alone cannot take the credit. A cardiology study on postural inversions in yoga reported that blood pressure can rise during the shoulder stand, which is why people with high blood pressure are told to avoid it. Never use an asana in place of medical treatment.
Who Should Avoid Sarvangasana?
Skip the pose, or practice only a gentler alternative, if any of these apply:
- High blood pressure or heart disease
- Neck problems such as cervical spondylosis, a slipped disc or a recent neck or back injury
- Glaucoma, diabetic retinopathy or other eye pressure problems
- Frequent headaches or migraine, or vertigo
- Pregnancy, and traditionally during menstruation
- A hernia, a very enlarged thyroid, or recent abdominal or spine surgery
- A cold, sinus congestion or breathing difficulty on that day
If you take medicine for blood pressure, diabetes or thyroid, speak to your doctor before attempting sarvangasana, and never change medication yourself. Stop at once if you feel pain, tingling, dizziness or pressure in the head or eyes. Legs up the wall is a gentler way to enjoy some of the same calm, though you should still check with your doctor if you are unsure.
Common Mistakes in Sarvangasana
- Turning the head. Even a small turn strains the neck.
- Skipping the blankets. Without support, the neck bends sharply.
- Letting the hips sag. Bending at the waist moves the weight onto the neck.
- Pressing the chin hard into the chest. Keep the throat soft.
- Holding too long. Longer is not better.
- Practicing after a meal. Wait several hours.
- Learning sarvangasana yoga only from videos. A teacher spots errors you cannot feel.
- Rushing out of the pose. Slow exits protect the spine.
- Skipping the counter-pose. The neck needs balancing afterward.
Counter Poses and Pranayama After Sarvangasana
After the shoulder stand, balance the neck and spine. Matsyasana (fish pose) is the traditional counter-pose, since it arches the upper back and opens the throat. Follow with a few breaths in Shavasana. A gentle seated forward bend such as Mandukasana later in the session can help the back and abdomen settle.
Once your heartbeat is steady, sit comfortably and practice slow, easy breathing. If breathing practices are new to you, read about the benefits of pranayama first and begin with a few minutes of gentle nostril breathing.
Here is a simple 30-minute order:
- Surya Namaskar: 5 minutes
- Setu Bandhasana and Viparita Karani: 5 minutes
- Sarvangasana (3 to 5 minutes including rests)
- Matsyasana: 2 minutes
- Mandukasana: 2 minutes
- Shavasana: 5 minutes
- Pranayama: 5 minutes
Practicing Sarvangasana in Dehradun
Dehradun’s seasons affect practice. Winter mornings in the Doon valley can be cold and stiff, so warm up longer and keep the room warm. Summer asks for early or evening sessions and plenty of water. During the monsoon, humidity makes mats slippery, so use a non-slip mat and keep your hands dry.
Students preparing for exams and professionals with desk jobs often carry tension in the neck and shoulders. A tight neck is a reason to go slowly with sarvangasana, not to push harder. Tell your teacher about any neck pain or medicines before class.
If you want guided practice, ask Kewalya Yogshala about beginner batches, class size and how teachers handle inversions for students with neck or blood pressure concerns.
Build It Slowly
Sarvangasana rewards patience. Spend a few weeks on the preparatory poses, add blankets and a wall, hold briefly and exit slowly. Skip it on days when your neck feels sore, when you are unwell or when you have eaten recently. A shorter, safer hold you can repeat is worth more than a long one that leaves you stiff.
Common Ask Question
A. It can be, with preparation, blanket support, and a teacher watching. Start with bent knees and short holds. Skip it if you have neck problems, high blood pressure, or any condition from the list above.
A. Start with 15 to 30 seconds. Many students build up to one to three minutes over several weeks. Come out early if you feel strain.
A. No. The evidence does not support these claims. Yoga may help you relax and stay active, but thyroid conditions need medical care, and an asana does not change adult height.
A. Many practitioners do, but only if the neck feels fine. If you notice soreness or stiffness, take rest days and ask your teacher to check your alignment.
A. Early morning on an empty stomach is the traditional choice. Evening works too if you wait three to four hours after a heavy meal.
A. No. In Shirshasana, the headstand, weight rests on the head and forearms. In the shoulder stand, it rests on the shoulders. Both are inversions and both need guidance.
A. Come down slowly and rest. Do not repeat the pose until a teacher checks your alignment. Persistent symptoms deserve a doctor’s advice.